Living in a 1600 sq ft house with five people, pretty much all the rooms in our home need to serve multiple functions. So I decided to DIY toy storage, bookshelves and a desk in the kids’ playroom . My boys love to read and we have acquired many books over the years, from birthdays, Christmas or second hand and we were running out of space. As a result, last year I decided to redesign their entire playroom so I could accommodate their changing needs. You all loved the slat wall bookshelves that I built for their room. It is a great way to store all their books but also a great feature of the room.
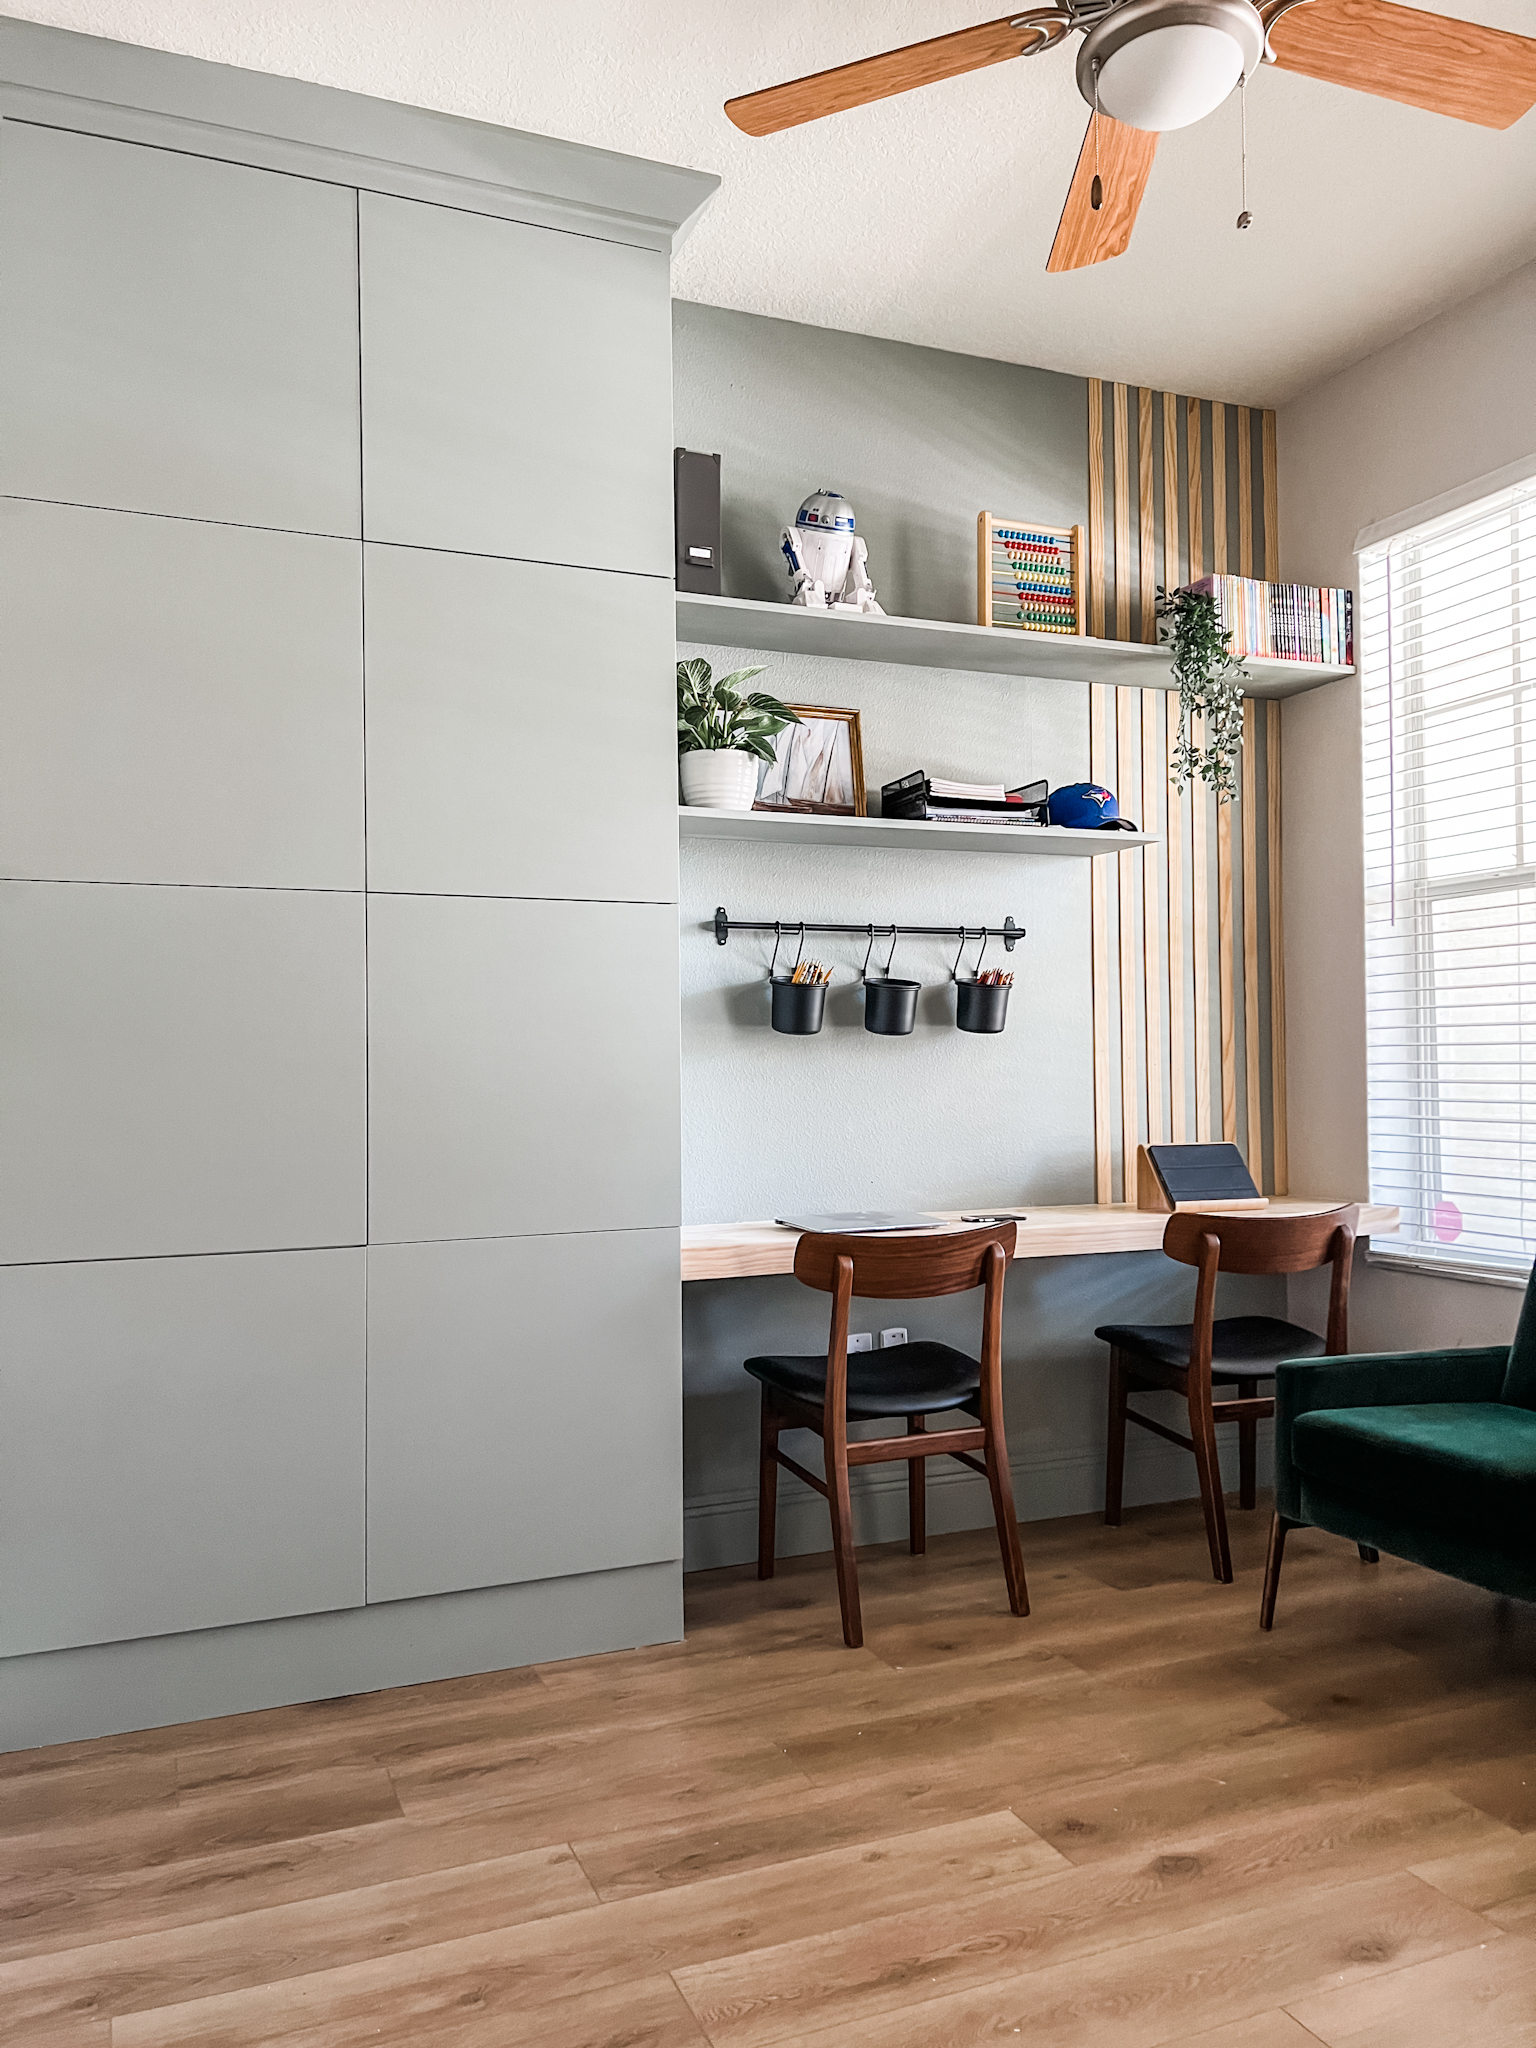
I finally finished the other side of their room and I couldn’t love it more. It is cute and functional. We have a tall cabinet to store all their toys, board games and school supplies. Next to it is a desk for them to do their homework and extra shelves on top for more books and supplies.
DIY Toy Storage, Bookshelves and Desk
1. DIY Playroom Toy Storage
Essentially, it is a playroom so having storage for all their toys, arts and crafts and school supplies was the starting point for this design. The clutter needs to be hidden! The design began with this large Ikea Besta unit and this smaller Ikea Besta unit being stacked on top of each other. With the cost of lumber these days, it was definitely more budget-friendly to use the Ikea units than to build our own cabinets, plus it’s a lot easier. To give it a built-in look, we built a base for the cabinets to sit on and secured it to the wall. Then we framed it with trim and crown molding. I added these budget-friendly brass knobs from amazon to make it easier to open the cabinet doors. This simple change completely elevated the look of the cabinets.


2. DIY Desk in the Kids’ Playroom:
To create the floating desk, we used this aluminum channel and mounted it on to the studs along the wall. You need this specific type of screws for it. Then we cut down the plywood to 15″ depth and to the length of the wall that the desk will be on. Once we had the plywood cut to size, we added a 1″x3″ pine board to the front of the desk making the the total depth of the desk 15 3/4″. The desk was screwed into the aluminum channel and also from inside the cabinet.

3. DIY Shelves in the Kids’ Playroom:
I built the shelves exactly the same way I built the reading nook. You can read more about it this DIY Slat Wall Bookshelves post.
The Paint in the Kids’ Playroom:
It took me some time to choose a paint color but it was totally worth it. I am obsessed with the final choice, Escape Gray by HGTV Home by Sherwin Williams. It is the perfect neutral green and I want to paint it in all the rooms. To prep the Ikea Besta units for painting, I primed it with BIN. You cannot skip this step or else the paint would chip off the Ikea units. The BIN primer allows paint to properly adhere to the laminate on Ikea cabinets. Once the primer was dried, I painted it with two coats of the Escape Gray in the Infinity line using this roller for smooth surfaces. I also painted the shelves the same color. For the desk, I kept it natural and sealed with 3 coats of water based polycrylic matte. I sanded lightly in between each coat using 220 grit sandpaper.
Finishing Details:
To make sure the room feels cohesive, I added this slat detail running down the right side of the wall using these lattice trims, creating a similar look to the bookshelves on the other side.The desk is not very large considering it is for both my boys. To keep the desk clutter free and easy access, I added this rail and hanging containers to store all their pens and pencils. Another cute and functional touch to the overall design.


This kids’ playroom has it all, DIY toy storage, bookshelves and desk. It is a reading room, a playroom, a homework and gaming station. Although most days it is still complete chaos but at least there is a place for everything. Full details on their reading nook here. For details on the lego table, check out the all the steps in my lego table stories.
Related Posts
Ikea Rast Nightstand Hack
My media console and nightstand Ikea hacks were definitely my most popular projects of 2020…
January 28, 2021Projects on my 2021 To-Do List
Happy New Year everyone! I hope you all had a wonderful and relaxing Holiday! I…
January 13, 2021
