
DIY Slat Wall BookShelves
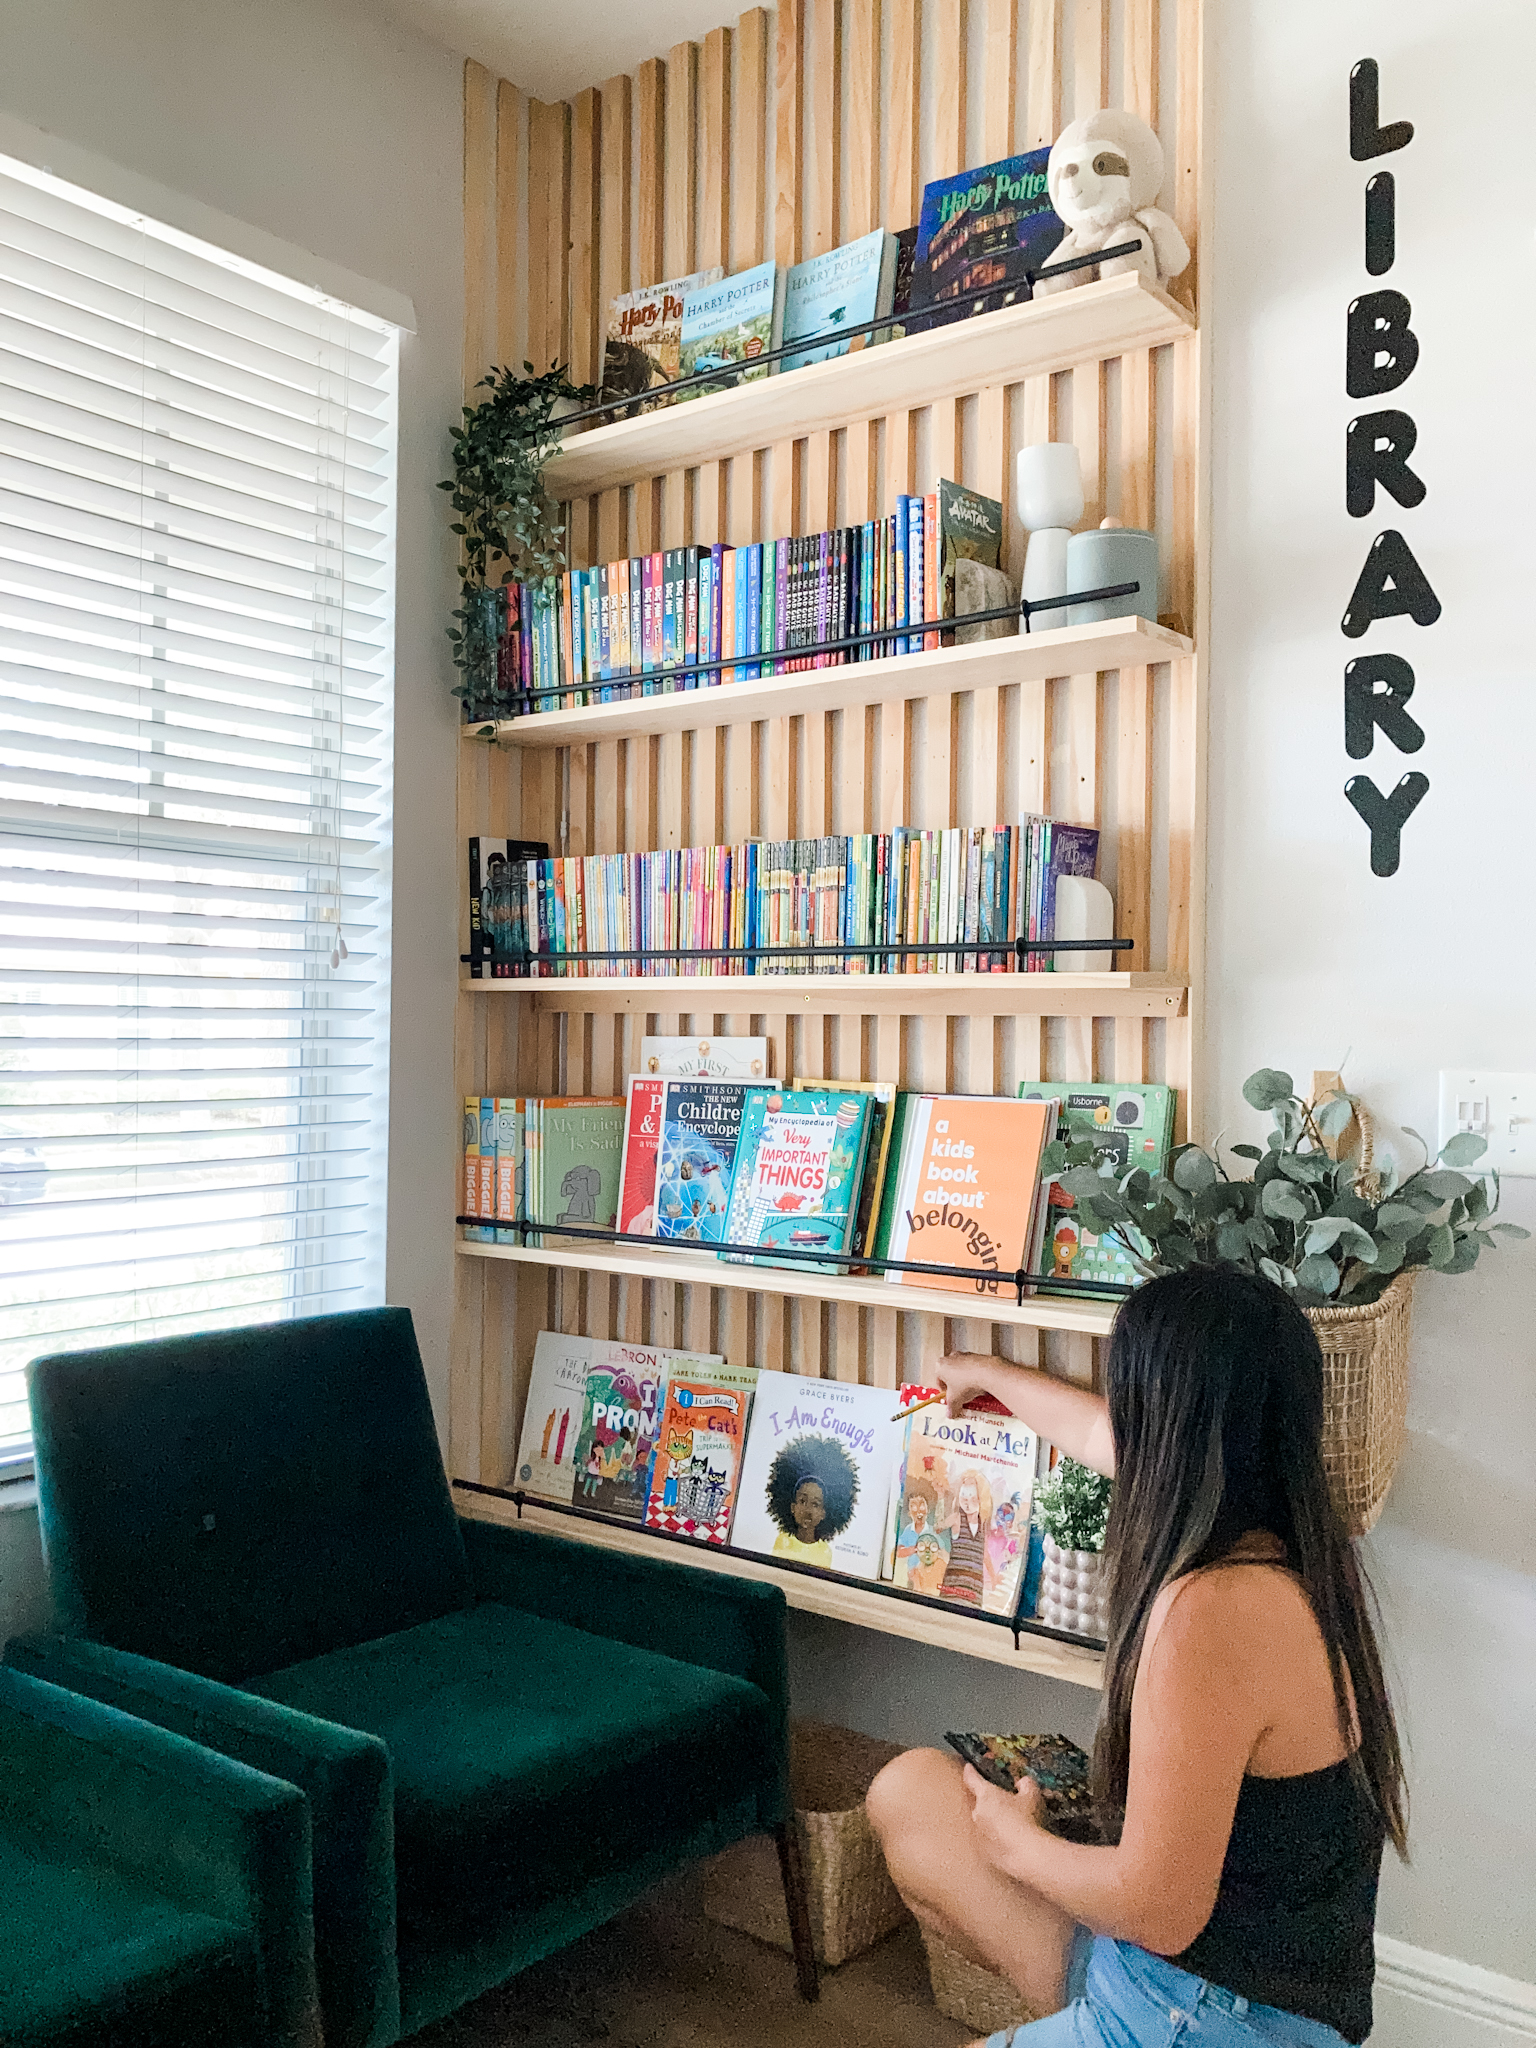
My oldest kid is an avid reader so his head is always buried in a book. As amazing as that may be, it also means we have a ton of books scattered throughout our home. Initially, we had picture ledges holding his books, but it was far from ideal. So I decided to DIY these bookshelves for him and came up with the idea of a slat wall behind it to add a design element to it. I was obsessed with how it turned out and so were many of you! My video for it went viral on all social media platforms: Instagram; Tik Tok and Pinterest. It quickly became one of my most recreated projects.
How you can DIY this Slat Wall Bookshelves:
Materials:
23 – 1″x2″x8′ Pine Boards (for the slat wall and shelf support)
5 – 1″x8″x6′ Pine Boards (for the shelves)
5 – 1/2″ x 4′ Dowels
10 1/2″ x 2″ Eye bolts
Miter Saw or Miter Box/Hand saw
2″ Screws
3″ Screws
1 1/2″ screws
Instructions:
Slat Wall Preparation
- The first thing you will need to do is locate the studs on your wall using your stud finder! This is the most important step as the shelves need to be mounted on studs to support the weight of the books on it. I was able to locate 3 studs on my wall.
- Once a stud is located, mark its position.
- Line the 1″x2″x8′ Pine Board along the stud. Make sure to use a level so your slats are vertical (plumb). Using your drill, create 3 pilot holes through the pine board and into the stud, where you would like the screws to be (top, middle, bottom). Note: My boards were used in a previous project and had many existing holes so I was not concerned with the location of the screws. If you want the screws hidden, then pre-determine the exact location of your shelves and place the screws where they will not be seen). I suggest making a simple mark on these slats so you do not forget which ones are mounted on studs later.
Slat Wall Install
- Drive a 2″ screw into the slat pilot hole and into the stud.
- Repeat for all slats that need to be screwed into the studs.
- Then determine the spacing for your slats based on the location of your studs. Initially I used the thickness of one of the boards to determine the spacing (3/4″). However, the boards felt too close together/cluttered so I took them down and spaced them about 1 1/4″ apart.
- For the slats not on studs, using a brad nailer, nail them into the wall using 2″ brad nails. Try to nail them at an angle. (I used anchors and screws in my project but in hindisight, it was not necessary. The shelves were not mounted on those slats so the brad nails and the shelves pushing up against it would have kept it in place). I wrapped three pine boards on the adjacent wall. NOTE: Use a level when installing each slat or you may end up with a crooked wall

Build Shelves
- To create the shelves, cut 3 of the 1″x2″x8′ pine boards in half using a miter saw or miter box/hand saw. (This will give you 6 pieces in total and I used 5). This will be the support slat for the shelves
- Assemble the shelves by attaching the 1″x2″ to the back (and bottom) of the 1″8″x4′ shelf boards with wood glue and a few 1 1/2″ wood screws.

To Mount the Shelves:
- Mount the first shelf near the bottom of the slat wall. Again, make sure to use a level. To mount the shelf, locate the slats that are on studs. Create pilot holes through the shelf support, into the slats and into studs. (In my case, there were three). Pilot holes prevent the wood from splitting. Screw the shelf into the pilot holes using 3″ screws.
- Repeat for all shelves. My shelves are 16″ apart.

Front Support:
- Spray paint the dowels black and let it dry.
- Mark the location of your eye bolts on the shelves. Mine are 6″ in from each end of the shelves.
- You will need to drill a pilot hole on the shelves for each eye bolt. Place a piece of frog tape about 1/2″ from the end of your drill bit so you know where to stop.
- Drill the pilot hole. Make sure to go slow and stop before you reach the tape.
- Screw in the eye bolts in to the pilot holes
- Slide the dowels into each eye bolt for each shelf
There you have it! That is how you DIY this beautiful and unique slat wall bookshelves for your home. You can now style with some of your favorite books. I created this space for my kids but it will look just as beautiful in an adult space. This has been one of most recreated designs and I love seeing it in your homes. As many of you know, I love wall treatment but also love making it functional. Check out this slat wall that I turned into a living plant wall. If you want to try out a different style of wall treatment, I love this classic picture frame molding.

Related Posts

How to Turn a Nook into a Functional Display Case
Do you ever wonder why your home is built they way it is, why there…
March 29, 2022