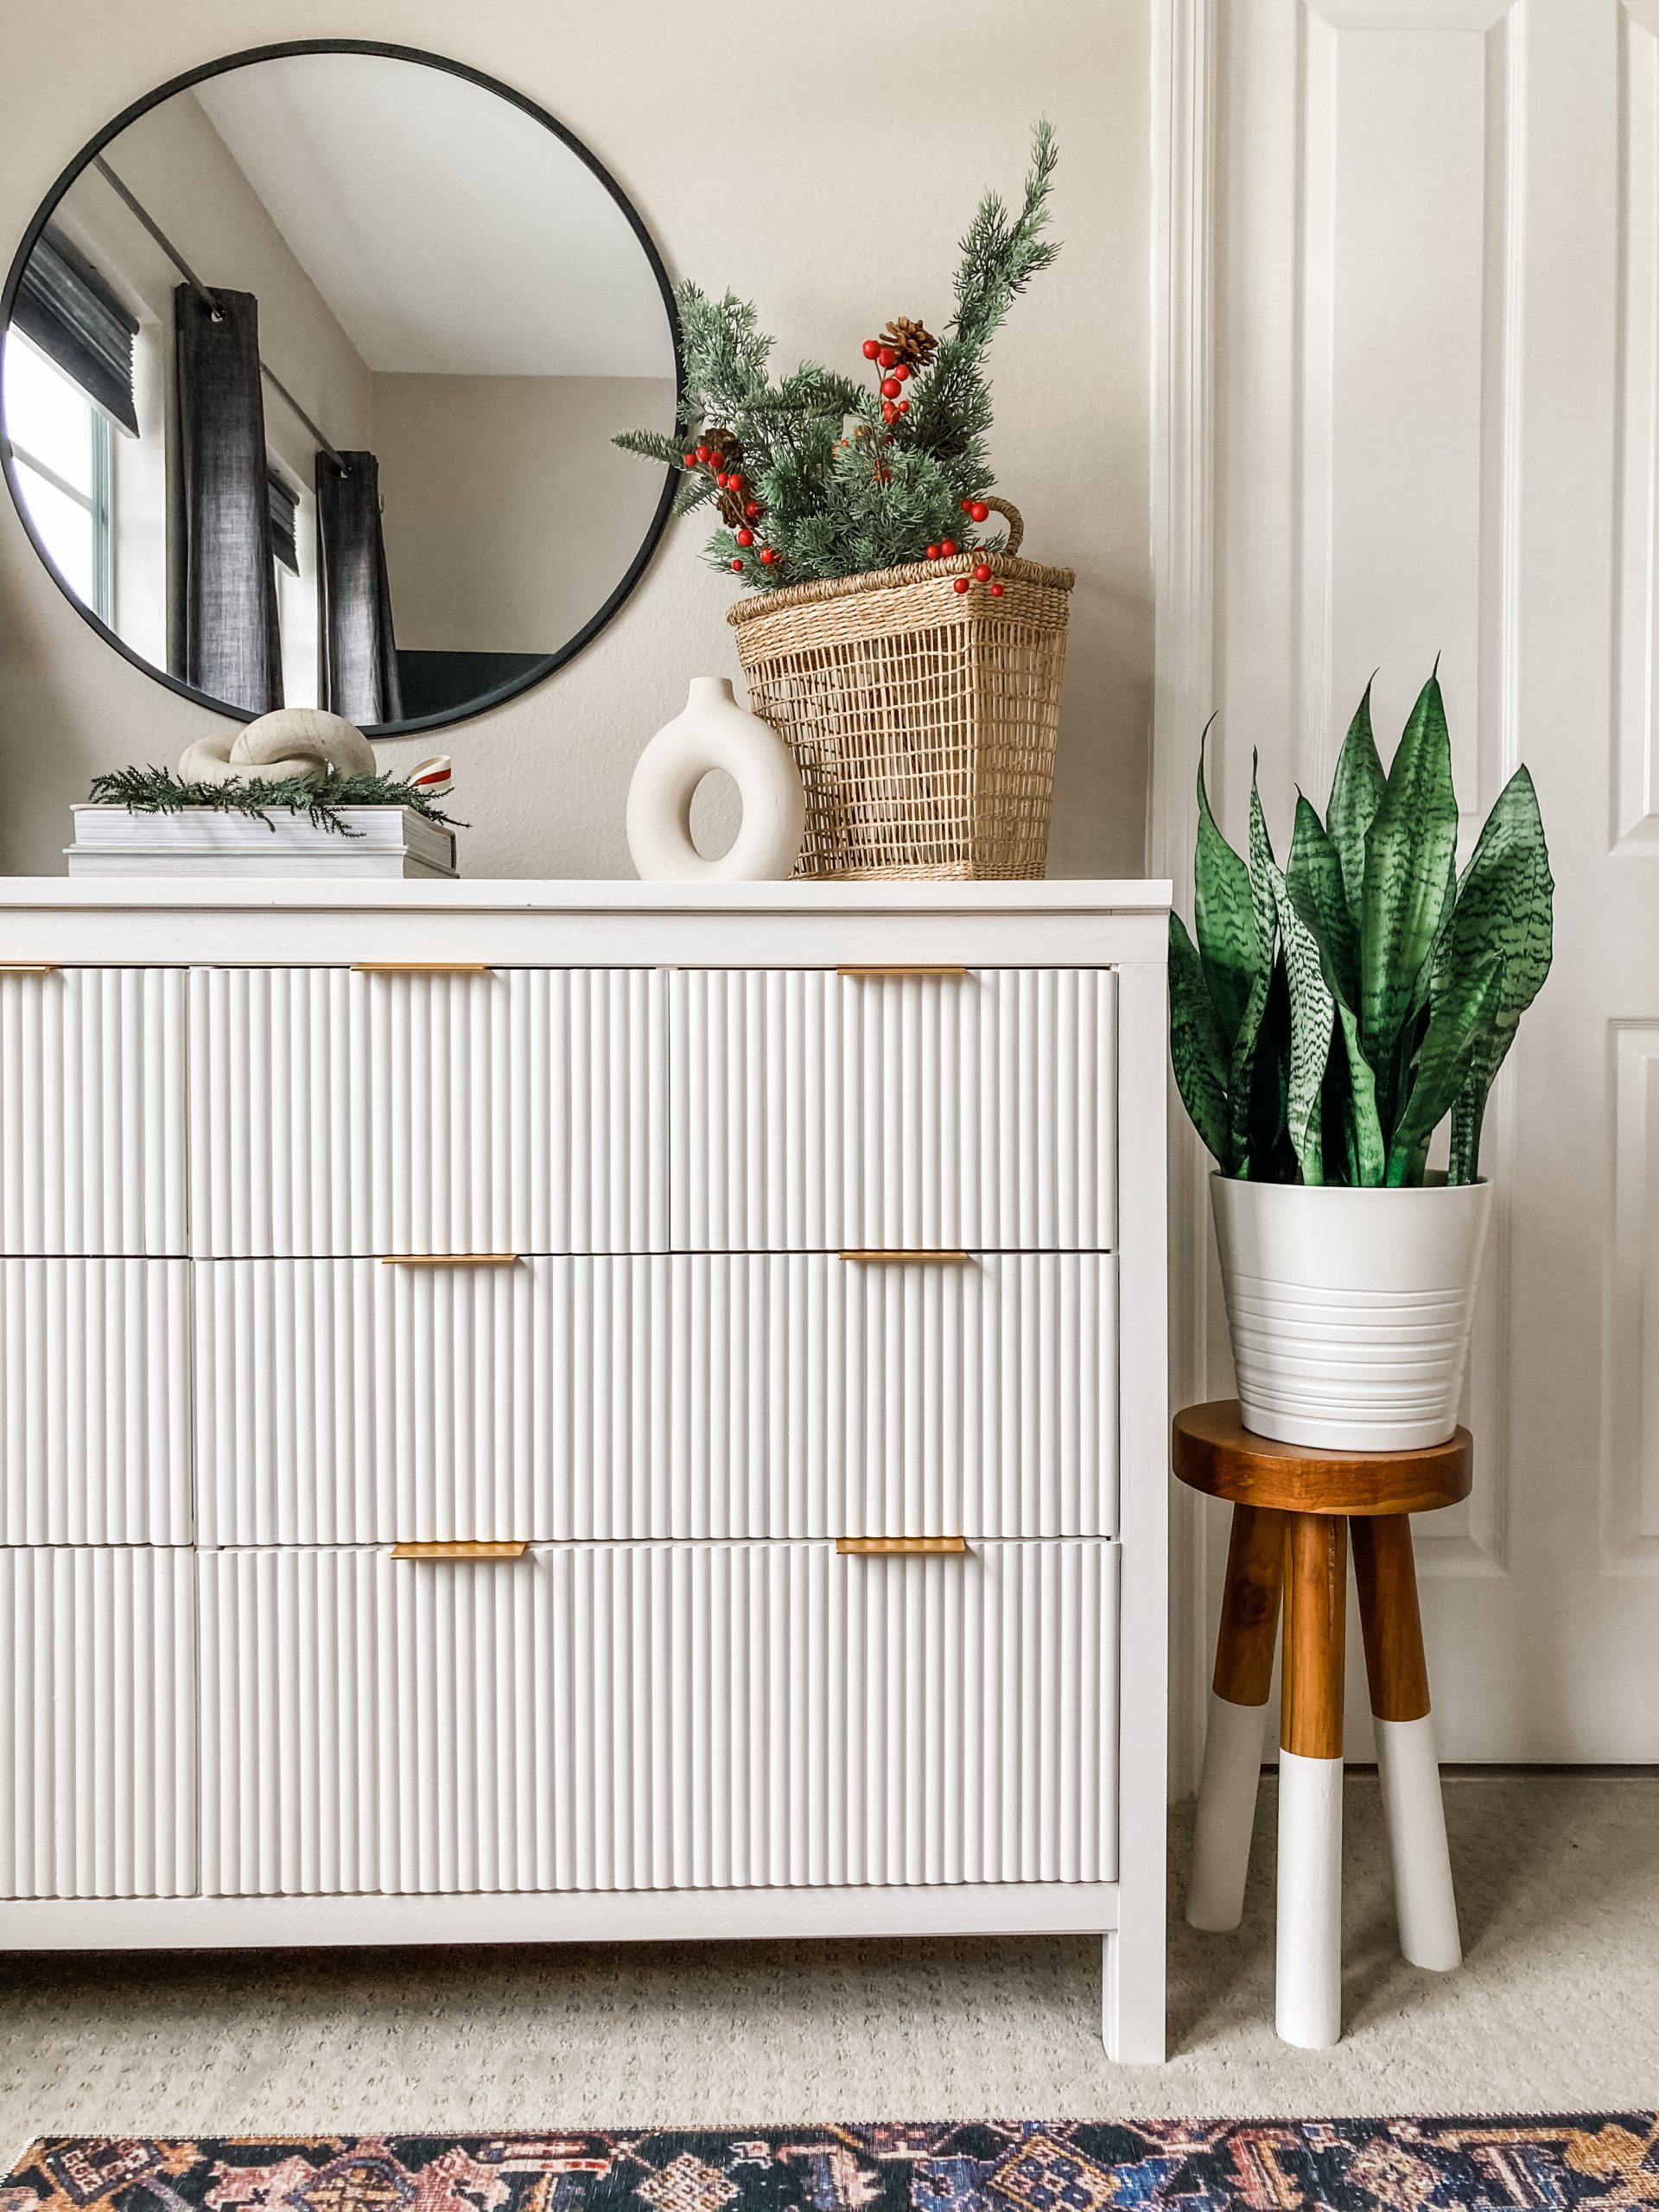
My most popular DIY of 2020 was definitely my Ikea Hemnes Dresser hack. I turned a very simple and popular Ikea piece of furniture into a much higher end looking (West Elm-ish) dresser. One of my favorite things about this project is that it represents what I am most passionate about, and that is sharing budget-friendly and ATTAINABLE DIYS. I strive to share projects that make you feel like YOU too can do it yourself! I want to empower you and instill confidence in your own abilities. If you like Ikea hacks, you’ll be sure to like this Ikea Patio one as well.
To create this look, I did something a bit different. I cut all of the fluted trims longer than the actual height of the drawers so it would cover the horizontal pieces of wood that separated the different levels of drawers. I also covered the vertical pieces of wood in between the smaller drawers on the top level. This created a more luxurious finish in my opinion.
To create this look:
1. You measure the height of each drawer on the top level plus the horizontal piece of wood. This should be the same for all 4 top drawers.
2. Once you have your measurements, cut the fluted trims to the desired length.
3. Use gorilla glue to start gluing each piece to the front of the drawer fronts. Make sure you account for the vertical wood pieces. You want to cover that as well so a few of the wood trims would be sticking out and not actually attached to the drawer front.
4. Use clamps to secure the trims in place to ensure the glue will bond the trim to the drawer fronts.
5. Once all the trims are attached and dried, cut the lattice trims to size to cover the outside rectangular edge of the dresser.
6. Nail the lattice trims to the dresser.
7. Once the lattice trims are nailed to the dresser, fill in the nail holes and gaps with wood filler.
7. Use paintable caulk to cover the seams between the fluted trim.
8. Pick your paint color. I would lightly sand down the entire unit so the paint adheres to the dresser well. Make sure you use a high quality velvet roller when painting furniture and using high quality paint such as Benjamin Moore Advanced Interior Paint.
9. One other thing I did to the dresser is cut off the overhang on the two sides of the dresser. This is definitely not necessary. I thought it made dresser look more complete but honestly, I think it would have been fine as is. To cut off the overhang, I removed the top of the dresser and used a circular saw with my Kreg guide for a straight cut.
Let me know if you ever try this or if you would like to see more Ikea hacks. You can also check out the process in my Instagram highlight reel here (under Fluted Dresser).


